CloudFront FunctionsでHTTPヘッダーの追加
AWSで、CloudFront Functionsを使えるようになりました。
今回は、キャッシュヘッダーとセキュリティヘッダーの追加手順を紹介。
HSTS Preload Listへの登録も行いました。
Content Security Policyヘッダーは、外部のサービス(Googleマップ等)を使っている場合には、お勧めしません。
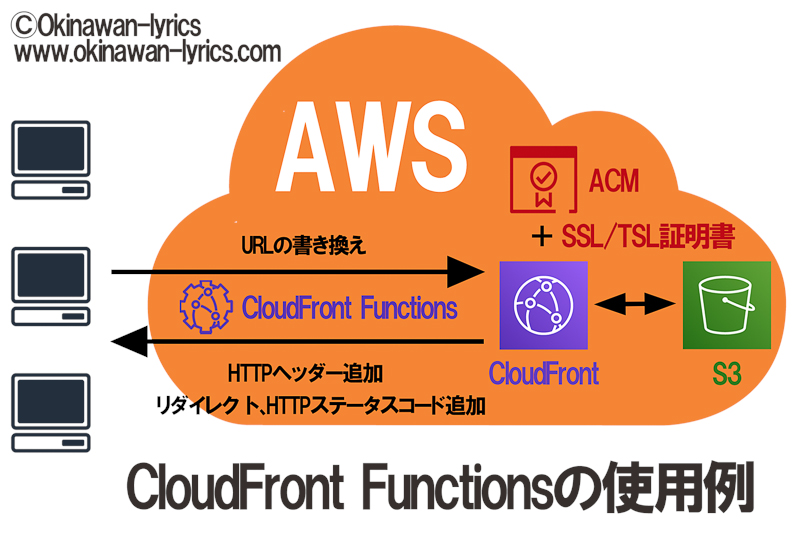
CloudFront Functionsは、CloudFrontに渡す前のリクエストURIやリクエストヘッダー、CloudFrontからのステータスコードやレスポンスヘッダーを簡単に操作できます。
リクエストURIの書き換え、リダイレクトなどについて、簡単な図を作ってみました。
AWSの公式HPに「CloudFront Functions のコード例」でコードが公開されています。
JavaScriptを分かってなくても、大丈夫そうですね。笑
レスポンスに Cache-Control ヘッダーを追加する
レスポンスにセキュリティヘッダーを追加する
注意が必要なのは、content-security-policy。
外部のサービス(GoogleアナリティクスやGoogleマップなど)を使っている場合には、初期設定のままだとHPが破綻します。
特にGoogleマップは、img-src、script-src、child-src(frame-src)の設定が大変です。
今回は、content-security-policyを断念しました。汗
今回適用するコードは、以下です。
まずは、AWSマネジメントコンソールで、CloudFrontに移動。
左側のFunctionsを押すと、Functionsのページに移行します。
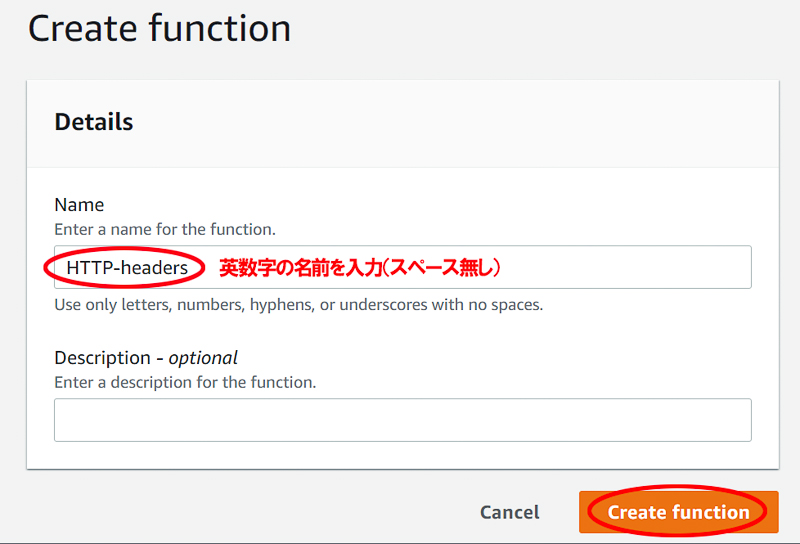
右側のCreate Functionを押すと、画面がCreate Functionに移行。
Nameの項目に、英数字の名前を入力(スペース無し)を入力。
再度、Create Functionを押します。
画面が移行したら、BuildタブのFunction Codeに、コードを貼り付け。
Save Changesをを押します。
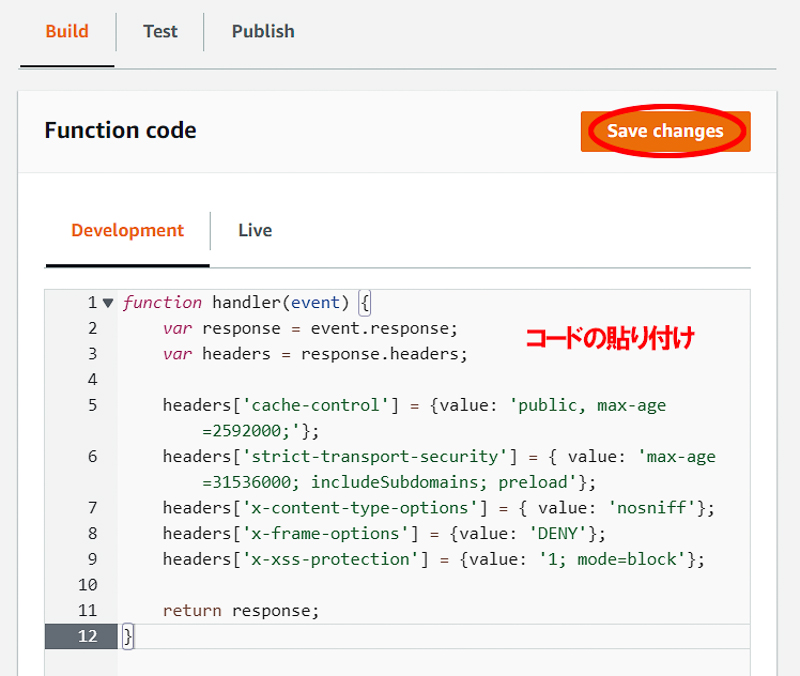
Successfully updatedが上部に表示されたら、Testタブを押します。
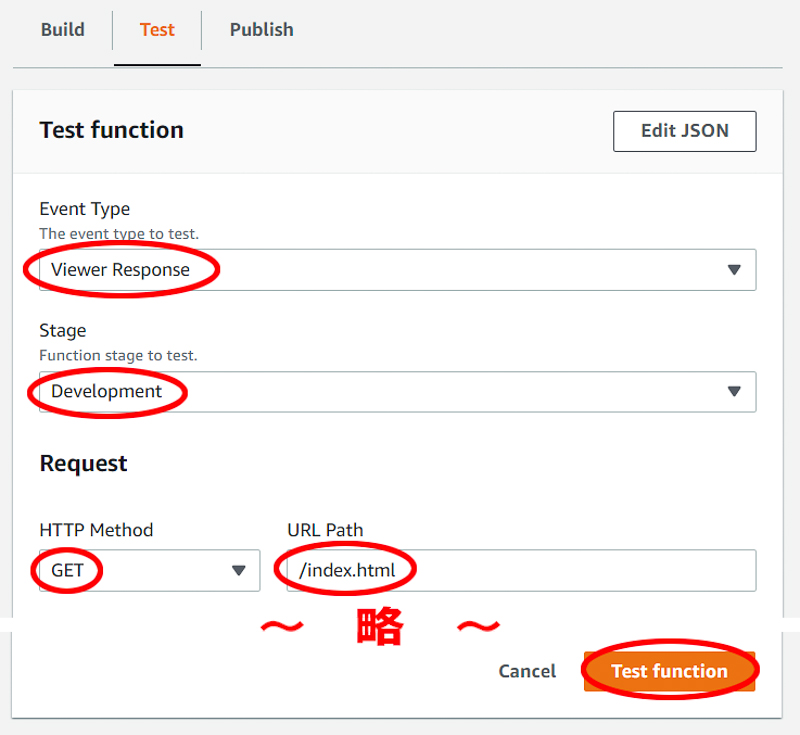
キャッシュヘッダーとセキュリティヘッダー追加なので、以下に変更するだけ。
Event Type「Viewer Response」、Stage「Development」、HTTP Method「GET」、URL Path「/index.html」
Test Functionを押します。
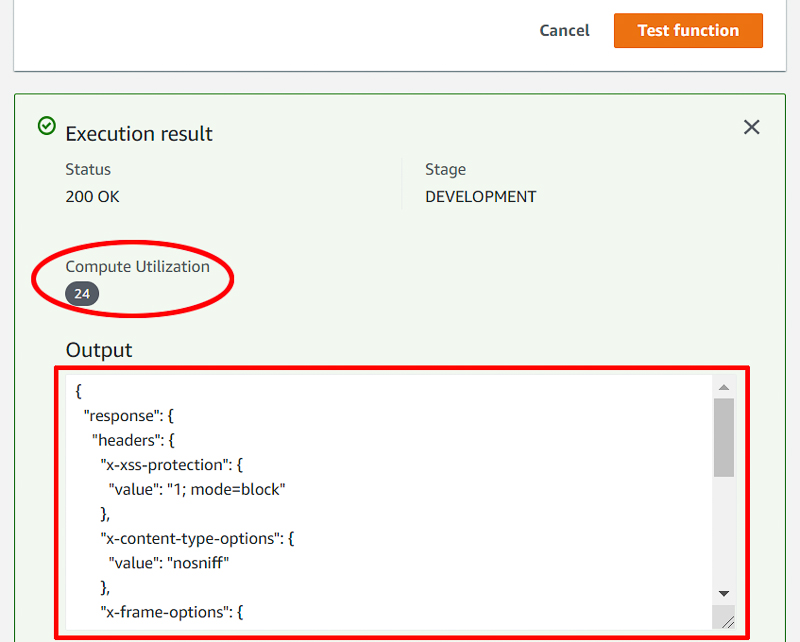
Test Functionの下に、Execution Resultが表示されます。
Compute Utilizationが100以下であれば、コードの量は問題なし。
Outputで、ヘッダーが設定通りに出力されたかを確認して下さい。
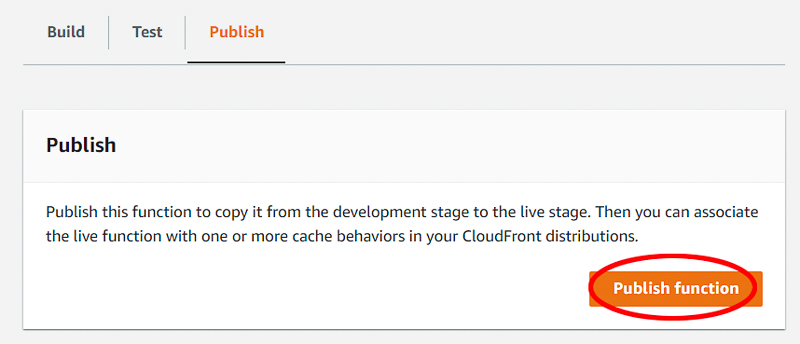
Publishタブで、Publish Functionを押します。
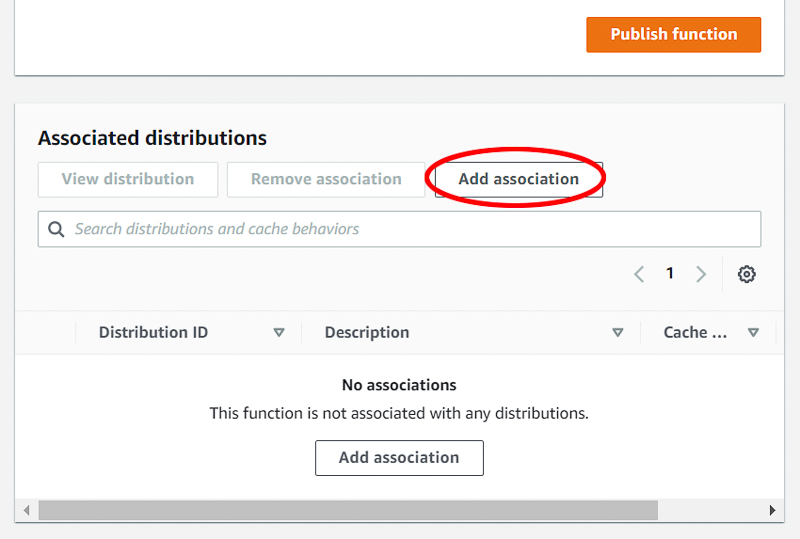
Successfully publishedが上部に表示されると、下にAssociated distributionsが表示されます。
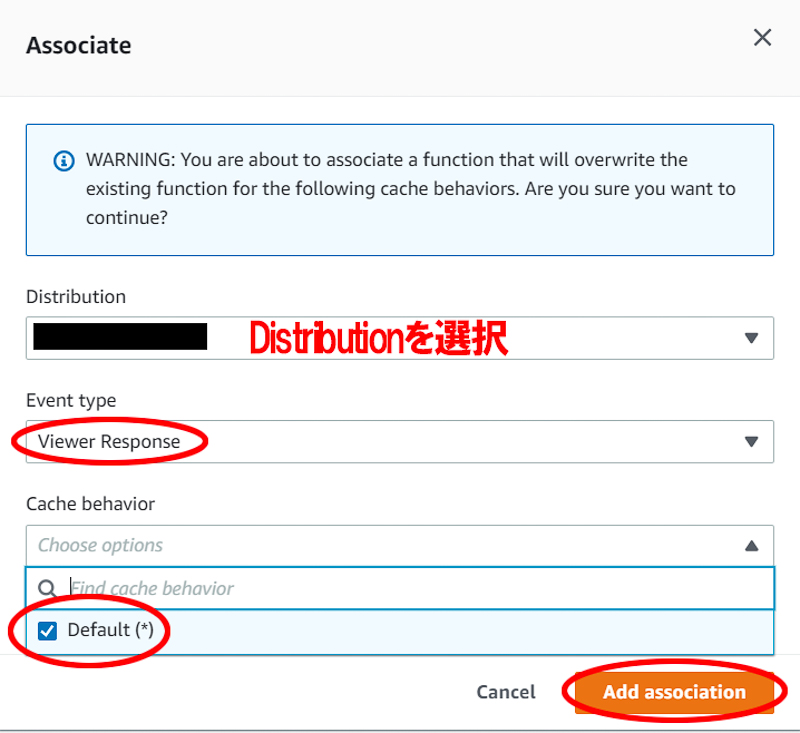
Add Associationを押します。
Associateの画面が表示されるので、Distributionを選択、Event type「Viewer Response」Cache behavior「Default(*)」。
Add Associationを再度押します。
Functionの最初の画面で、Statusが「Published」から「Deployed」に変わればokです。
念のため、CurlでHTTPヘッダーを確認。
Windows10では、標準でCurlが実装されています。
コマンドプロンプト(cmd)で、以下を入力。
リターンキーを押して、以下を確認。
Strict-Transport-Security(HSTS)で、preloadを設定しているので、HSTS Preload Listに登録します。
HSTS Preload List SubmissionのEnter a domainに、登録するドメインを入力。
Check HSTS preload status and eligibilityを押します。
www.example.comの場合には、以下のエラー画面になります。
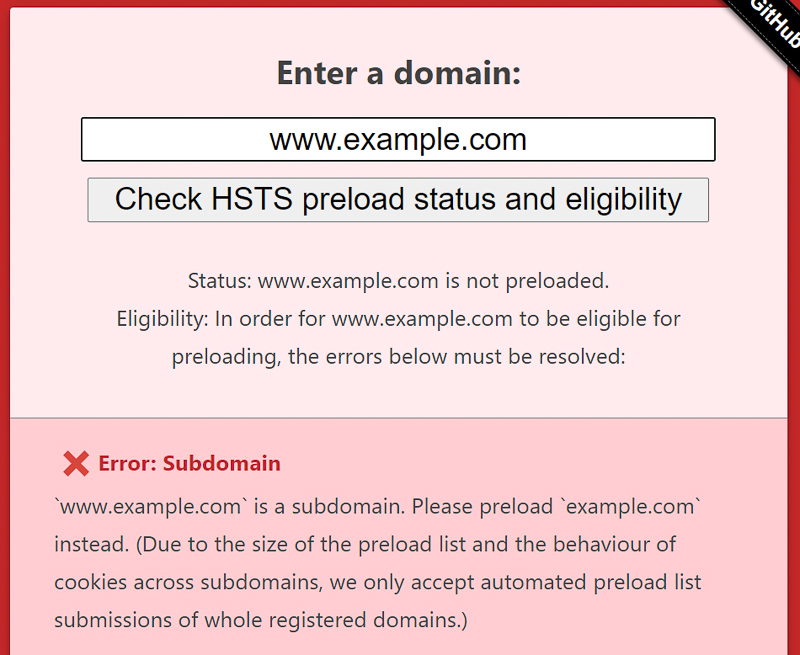
これは、HSTS Preload Listにはサブドメインを登録できないためです。
“
この場合には、https://example.comからhttps://www.example.comへ、リダイレクトするようにCloudFrontを設定してください。
また、ClourFrontのDistribution(example.com)にも、HSTSヘッダーを追加するのを忘れないでください。
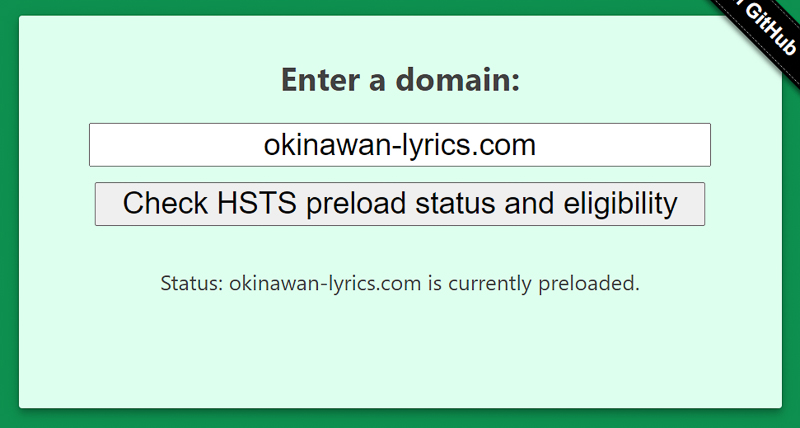
このブログは、www.okinawan-lyrics.comですが、okinawan-lyrics.comで登録できました。
登録完了には、数日かかりました。
今回は、キャッシュヘッダーとセキュリティヘッダーの追加手順を紹介。
HSTS Preload Listへの登録も行いました。
Content Security Policyヘッダーは、外部のサービス(Googleマップ等)を使っている場合には、お勧めしません。
CloudFront Functionsは、CloudFrontに渡す前のリクエストURIやリクエストヘッダー、CloudFrontからのステータスコードやレスポンスヘッダーを簡単に操作できます。
リクエストURIの書き換え、リダイレクトなどについて、簡単な図を作ってみました。
AWSの公式HPに「CloudFront Functions のコード例」でコードが公開されています。
JavaScriptを分かってなくても、大丈夫そうですね。笑
レスポンスに Cache-Control ヘッダーを追加する
function handler(event) {
    var response = event.response;
    var headers = response.headers;

    // Set the cache-control header
    headers['cache-control'] = {value: 'public, max-age=63072000;'};

    // Return response to viewers
    return response;
}
レスポンスにセキュリティヘッダーを追加する
function handler(event) {
    var response = event.response;
    var headers = response.headers;

    // Set HTTP security headers
    // Since JavaScript doesn't allow for hyphens in variable names, we use the dict["key"] notation
    headers['strict-transport-security'] = { value: 'max-age=63072000; includeSubdomains; preload'};
    headers['content-security-policy'] = { value: "default-src 'none'; img-src 'self'; script-src 'self'; style-src 'self'; object-src 'none'"};
    headers['x-content-type-options'] = { value: 'nosniff'};
    headers['x-frame-options'] = {value: 'DENY'};
    headers['x-xss-protection'] = {value: '1; mode=block'};

    // Return the response to viewers
    return response;
}
注意が必要なのは、content-security-policy。
外部のサービス(GoogleアナリティクスやGoogleマップなど)を使っている場合には、初期設定のままだとHPが破綻します。
特にGoogleマップは、img-src、script-src、child-src(frame-src)の設定が大変です。
今回は、content-security-policyを断念しました。汗
今回適用するコードは、以下です。
function handler(event) {
    var response = event.response;
    var headers = response.headers;

    headers['cache-control'] = {value: 'public, max-age=2592000;'};
    headers['strict-transport-security'] = { value: 'max-age=31536000; includeSubdomains; preload'};
    headers['x-content-type-options'] = { value: 'nosniff'};
    headers['x-frame-options'] = {value: 'DENY'};
    headers['x-xss-protection'] = {value: '1; mode=block'};

    return response;
}
まずは、AWSマネジメントコンソールで、CloudFrontに移動。
左側のFunctionsを押すと、Functionsのページに移行します。
右側のCreate Functionを押すと、画面がCreate Functionに移行。
Nameの項目に、英数字の名前を入力(スペース無し)を入力。
再度、Create Functionを押します。
画面が移行したら、BuildタブのFunction Codeに、コードを貼り付け。
Save Changesをを押します。
Successfully updatedが上部に表示されたら、Testタブを押します。
キャッシュヘッダーとセキュリティヘッダー追加なので、以下に変更するだけ。
Event Type「Viewer Response」、Stage「Development」、HTTP Method「GET」、URL Path「/index.html」
Test Functionを押します。
Test Functionの下に、Execution Resultが表示されます。
Compute Utilizationが100以下であれば、コードの量は問題なし。
Outputで、ヘッダーが設定通りに出力されたかを確認して下さい。
Publishタブで、Publish Functionを押します。
Successfully publishedが上部に表示されると、下にAssociated distributionsが表示されます。
Add Associationを押します。
Associateの画面が表示されるので、Distributionを選択、Event type「Viewer Response」Cache behavior「Default(*)」。
Add Associationを再度押します。
Functionの最初の画面で、Statusが「Published」から「Deployed」に変わればokです。
念のため、CurlでHTTPヘッダーを確認。
Windows10では、標準でCurlが実装されています。
コマンドプロンプト(cmd)で、以下を入力。
curl -i テストするURL
リターンキーを押して、以下を確認。
HTTP/1.1 200 OK
Strict-Transport-Security: max-age=31536000; includeSubdomains; preload
X-Xss-Protection: 1; mode=block
Cache-Control: public, max-age=2592000;
X-Frame-Options: DENY
X-Content-Type-Options: nosniff
Strict-Transport-Security(HSTS)で、preloadを設定しているので、HSTS Preload Listに登録します。
HSTS Preload List SubmissionのEnter a domainに、登録するドメインを入力。
Check HSTS preload status and eligibilityを押します。
www.example.comの場合には、以下のエラー画面になります。
これは、HSTS Preload Listにはサブドメインを登録できないためです。
“
www.example.com is a subdomain. Please preload example.com instead. (Due to the size of the preload list and the behaviour of cookies across subdomains, we only accept automated preload list submissions of whole registered domains.)”この場合には、https://example.comからhttps://www.example.comへ、リダイレクトするようにCloudFrontを設定してください。
また、ClourFrontのDistribution(example.com)にも、HSTSヘッダーを追加するのを忘れないでください。
このブログは、www.okinawan-lyrics.comですが、okinawan-lyrics.comで登録できました。
登録完了には、数日かかりました。
← 前の記事:瑞泉通り(那覇市首里崎山町)のサガリバナ並木 2021
次の記事:ペルセウス座流星群@辺戸岬 2021 →